|

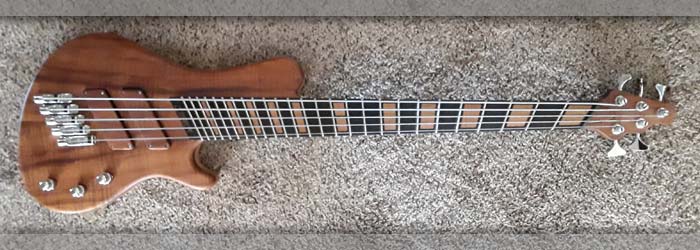
The back looks as cool as the front.
|
Left: Quick shot of the back - nice and clean and no ugly screws to mess things up. Feels comfortable and balanced and has a good tone. Right: Working on very carefully packing the instrument inside its case. Once that's sealed up the case itself will be equally carefully packed into a shipping box so that it's really well protected. |

Can't have too much padding when shipping something like this.
|
|

Very nice and unique bass ready to do some traveling.
|
Left: The instrument is in its case and I will be weighing and measuring the shipping package to determine the shipping cost and delivery scheduling! Right: Checking intonation and a few other details before I get this instrument packed in its case and shipping box. It certainly is a very classy instrument all over. |

Tweaking bridge saddles and making sure it's safe to travel.
|
|

Final adjustments and getting it ready for some glamour shots.
|
Left: Adjusting truss rod with strings under tension. This bass will be traveling a long way so want it set up and settled in asap. Plays and sounds really good! Right: Right now I am leveling the frets, doing final truss rod adjustments and making sure nut slots are finalized also. I need to get it in its case and weigh for shipping. |

Bass looks and feels great. Getting it ready to travel.
|
|

This bass is just about done now - I need to weigh it in its case and calculate the best way to get it shipped!.
|
Left: Just about done with the filing of the nut slots and the final shaping of the edges of the nut. Doing some truss rod adjustments on the bench right now and some careful leveling work to tops of frets. Right: Nut refined, truss rod adjusted, saddles adjusted. Now carefully shaping the covers to make removal of each easier by hand. |
This bass is just about done now - I need to weigh it in its case and calculate the best way to get it shipped!.
|
|

Last few details on the fingerboard - dressing all the fret ends and cleaning up surfaces.
|
Left: I did all the fret dressing today and then cleaned everything up with 600 git paper and steel wool. Now I will be applying a fingerboard conditioner to the top wood surface. Right: Got the strings on the bass so that I can get the nut finished up. Looks good with the strings on and I can now test sound and get some glamour shots. |

Strings are on which allows me to check and adjust all the nut slots.
|
|

some fingerboard cleanup and setup work before strings are added.
|
Left: One of the last things I have to do is a final fret dress on the fret ends, standard leveling, and adding conditioner to the top wood surface. Right: Knobs back on after slight mods to pot shaft lengths. Bridge units ready for strings. I'm just finishing up detail work on the fingerboard and this bass will be pretty much a completed project. |

The Koa and the chrome hardware look really nice together.
|
|

Getting the strings on the instrument for final testing.
|
Left: I'm breaking out the DR strings for this bass and in doing so will be able to adjust the instrument bridge settings, truss rod and finalize the nut slot depths. Right: Strings are going on, I'm making a couple of minor adjustments to one bridge unit and the ends of the pot shafts. Bass almost ready to travel! |

Doing a last few mechanical adjustments to the bass.
|
|

Everything is wired up and organized in the control cavity.
|
Left: All the wires in the control cavity have been connected and I should have a complete and working system. Going to add strings and test it all out. Right: This is the case for the bass - a really nice Protec Contigo. They are light and strong and very good quality and I have been using these for many years! |

Just pulled the case out of its shippimg box. Will post a better photo of it.
|
|

Power supply to preamp set up in the battery compartment.
|
Left: I got the battery terminals attached to the power wires that will be feeding 18v to the Audere preamp. Next will be the common grounding wires. Right: Output plug has been connected to the system and all the bridge and preamp grounds have been connected to the common ground. Now to hook up the pickups! |

working through the wiring - when it's all connected I will tidy everything up inside the cavity.
|
|

Now getting the string slots established in the nut.
|
Left: Nut is shaped and I am now getting the string slots cut into it. I'm putting a spare set of strings on the bass for testing and a new set will go on before I ship out! Right: On the electronics bench now for wiring up the internal electronics. This will go fairly quickly as there aren't any LEDs or other complex requirements. |

Wiring this bass up for sound.
|
|

TFinally installing the five bridge units.
|
Left: Now adding copper tape to enhance connectivity and installing the bridge units in the five positions. Once this is done I can get the wiring inside the control cavity finished up! Right: I cut and installed the nut and I am now shaping it to suit the curve of the fingerboard. I will then file the string slots and we'll be ready for strings! |

Installing and doing final shaping to the nut.
|
|

The screw holes which locate the remaining three bridge units have now been established. I also swapped out the stock screws for stainless steel ones..
|
Left: I ended up using the laser to plot the specific steps between the outer screw holes on both sets (they are both different due to neck taper). Now I can get those established. Right: Running copper wire from individual bridge locations is NOT an easy job. Finally got this done and I can now get all the vridge units installed! |

The easy way to do this is to run a wire or copper tape across the top under the bridges but I didn't want to have anything visible so I decided to run individulal grounding from each bridge unit through to the control cavity.
|
|

Positioning the bridge units, establishing holes, creating grounding channels and then attaching units to the body.
|
Left: Some VERY careful planning going into the exact placement of the stringretainer/bridge units. Spacing and relative positions have to be pretty much exact to make everything look and work together! Right: The two outer bridge units have been positioned. I'm going to attach these and fit the remaining three relative to these. |

Once I have the two outer bridges attached I will position the remaining three and we're good to go!.
|
|

Knobs look really nice on the instrument..
|
Left: These are the chrome stacked knobs that will combine to give us Volume, Balance, hiMid, loMid, Bass and Treble. Looking good against the beautiful Koa wood! Right: The two recesses strap buttons are now installed on the front and the back of the instrument body. I'm now getting back to the bridge units which need to be grounded. |

Another task done on the bass - strap buttons are now in.
|
|

AOnce these bridge units are installed I should be able to get some strings on this bass! Also have matching chrome stacked knobs!.
|
Left: I'm using standard individual bridge units which will look awesome on this instrument. Placing them correctly on both axes takes a little careful planning. Also have to run ground wires down from each one. Right: Getting ready to mark placement and install the Dunlop strap locking system. The back one is easy but front one can be tricky! |

These recessed locking strap assembvlies are great.
|
|

Working on getting the truss rod cover attached and also positioning and installing the tuners.
|
Left: I installed a neo magnet in the truss rod cover recess so that we can retain the cover. Also getting started on the installation of the Hipshot tuners. Right: All five tuners have now been installed on the headstock. I now need to get a corresponding magnet onto the truss rod cover, install a nut and get the strings slots established. |

All tuners attached and working. Mow moving on to the nut and then the bridge units.
|
|

Working on fitting the tuners onto the headstock.
|
Left: While the wiring is under way I'm starting on the installation of the tuners. I first have to grind out overspray in the holes so that the tuner shafts will fit. Right: Got the Hipshot tuners physically fitted in their holes now I have to carefully align them to drill the holes for the locking screws. Should look really nice when done. |

It will be great to get the tuners on the headstock. Will also fit a add magnets to the little truss rod cover.
|
|

Getting things going on the install of the Audere preamp.
|
Left: I reamed out the holes in the top to fit the Audere potentiometers on the preamp so I can now go ahead and install the preamp unit and get everything wired up to create sound! Right: Wiring of Preamp is under way. Got the pots fitted and now hooking up pickups, battery power and output. Shielded the back of the cover lid too! |

Right in the middle of wiring everything up in the control cavity.
|
|

There's something happening every day in this race to the finish line. Everything is ready for the preamp to go in so I will be moving ahead with that.
|
Left: Two more things happening. One is that I installed magnets in the battery recess for the battery cover. The other is that I am getting things ready to install the Audere 4-band preamp! Right: Got the magnets installed in the undersides of the two covers so I can consider that job done. Need to copper shield back of cavity cover. |

The Koa covers look good on teh back of the bass. No ugly screws to mess up the nice lean back of the instrument.
|
|

Great to have the pickups in because that provides me with the pickup wiring inside the cavitywhich will then get connected to the preamp.
|
Left: Each pickup needs 4 screws for adjustment and in this case I am using surgical tubing instead of springs for the counter-pressure. Bridge pickup on - neck one going in. Right: Pickups in - now I'm going to add a set of very thin neo magbenets to the underside of the cavity lid. I'm using a paper tempplate to align the magnets. |

This template allows me to accurately place the thin magnets in the underside of the cover.
|
|

Output socket being fitted into the recess in teh side of the body.
|
Left: I'm now filling and installing the Neutrik output socket. I will also be adding grounding wires and installing the two pickup assemblies so things will be looking much more complete! Right: Time to install the two pickup assemblies. I added ground continuity connections so I can now get these pickups in and set up as part of the bass |

The pickups look great with their continuous grain now that they are part of the instrument.
|
|

Adding holes for the magnets that will hold the cavity cover in place.
|
Left: Before I finish the copper shielding in the cavity I am drilling holes for the neo magnets which hold the cavity cover in place. When they are in I'll finish the remaining copper. Right: I installed neo-magnets in the bosses on the inside of the cavity for lid retention, and I then was able to finish up the application of copper shielding. |

Magnets in and copper shielding applied. I will now connect the pickup shielding to the main cavity.
|
|

Putting the copper shielding in the pickup recesses so that I can get the two pickups installed into the body.
|
Left: Pickups are ready to go in the instrument and I am currently lining the two pickup recesses ewith copper shielding. I'll connect that shielding to the cavity to create our common ground. Right: I'm now lining the control cavity with the same copper shielding tape. Once this is done I will inter-connect the two pickups recesses to this. |

Shielding the control cavity so that I can start getting wiring and electrinics in there.
|
|

Pickups have now been assembled into their covers.
|
Left: I got the two pickup bobbins successfully fitted into their covers and these will now be ready for installation into the instrument. Will be doing some cavity shielding next. Right: The bridge units I am putting on this bass are very high quality. They allow standard surface string attachment or string through body. They will be going on soon. |

These are the best single string bridge units I know of.
|
|

These are all the various covers and the two pickups. I'll be working on getting these all physically fitted.
|
Left: First job is top fit the covers - usually there's a little overspray that has to be manually removed top get everthing to fit just right. These aren't too bad though. Right: Pickups have been would and now need to be fitted into their continuous woodgrain covers. I will also be adding copper shielding to the pickup recesses. |

Had these pickups wound by my electronics guru - nice and hot - they should sound really good.
|
|

Just got the bass home from the finisher. Looks beautiful. I'm going to be working on it to get all the parts fitted so will be posting plenty of pictures.
|
Left: Just got this bass back from the finisher and I wanted to try and get a few initial photos up. Woods look great and surface has a great feel. I'm going to be busy in the coming days! Right: This is the back of the instrument as I received it from the finisher. Everything looks really good. I will have to fit the two covers next. |

Back of the bass looks really impressive too. Laminates look really nice!.
|
|

andding just about done and I will be drivig this bass and all its cover/pickup parts to my finisher.
|
Left: The hardest part to finish sand was the transition between the neck and the body. After several blisters on my fingers it's ready to go Right: I have been doing a LOT of sanding all over to get it beautifully smooth and ready to go to my finisher. Taking it to him so that he can do his incredible work and make this bass look amazing!!! |

It's a beautiful bass right now but I know that it will look SO much better after finishing!! Can't wait!.
|
|

Lots of sanding going on right now.
|
Left: Busy right now doing the overall sanding to get the whole instrument to a nice smooth and even finish prior to going out for the Poly-Resin finish which will totally transform it! Right: The bass is pretty much sanded all over now and I will be finishing everything up over the weekend so that I can take it to finishing!! |

It's a beautiful bass right now but I know that it will look SO much better after finishing!! Can't wait!.
|
|

Doing some finishing work around the perimeter on the spindle sander.
|
Left: I am cleaning up the body perimeter on the spindle sander so that I have a final profile to work from. After this - I will start breaking the edges with a radius all around front and back. Right: I got started on the roughing work that will become the radius that runs around the front and back edges of the body. Should look good! |

Edge breaks and sanding underway - will be headed to finishing soon.
|
|

Cutting holes and recesses for the potentiometers .
|
Left: Getting the control holes and recesses established for the knobs that I will be using. Once these are all cut the rest of my work is going to involve a LOT of sanding! Right: This is the bass with the control holes and recesses established. All looks good so I am going to start on the body edge radii and finishing belly cut. |

Now that I have the control holes done I can start on the finishing of the edges and external radii around the body.
|
|

I will be drilling three countersunk holes to provide placement for the Audere 4-band preamp. It requires three stacked knobs.
|
Left: Getting the bass ready for the cutting of the control knob recesses. It's the last machining job I need to do on this bass and I want to get it to finishing as soon as possible!! Right: Wanted to show the two back covers which I carefully sanded and fitted into their cavity recesses. Wait till you see it after finishing!! |

The two cavity covers are fitted on the back - a nice reflection of the koa all over the front of the bass..
|
|

TMachining done on the control cavity cover. Now to cut the battery cover.
|
Left: This is the control cavity cover being machined from the Koa stock. I will also cut the battery recess cover and get the two covers fitted, rediused and sanded. Right: I got the second cover machined and will be sanding both of these to get them fitted and ready for finishing. Once the finish is on they will really look impressive! |

Got the two covers machined. Things are moving quickly towards final sanding and then off to final finishing!.
|
|

Headtsock pretty much finished shape - I'm in the middle of doing sanding on both the headstock and the truss rod cover.
|
Left: Headstock has been sanded to finalize the outer profile. Just needs sanding now to get this area all finished up. Anxious to get this instrument to finishing! Right: I cut and sanded some of the same KOa that's on the front of the bass to create matching cavity covers. Made one extra for safety. Now going to cut them to size. |

Thought it would be a very classy touch to create covers that were made of the same Koa as the front and inlay on the bass.
|
|

Grinding the back of the neck to the optimum geometry.
|
Left: I was working on the carving of the neck and body transition to get the geometry of the blend between body and neck set and ready for final sanding. Right: I marked out the locations of the tuner holes and drilled them through the headstock. I will do some cleanup on the edges to finish up this area. Control holes coming up. |

GJust about done with the headstock area - just have to modify the profile round the holes a little.
|
|

Good to get these two covers machined on the insides. After drilling 4 adjustment holes these will be done.
|
Left: The two continuous grain pickup covers have been machined on the insides to make room for the pickup bobbins. I will drill adjustment holes in them. Right: Time to look at the placement and drilling of the tuner holes in the headstock. I will get them drilled to fit the Hipshot tuners and that will let me finish up the headstock geometry. |

I plotted out the ideal placement for the tuner pegs on the computer and used that to mark out the drilling positions.
|
|

Started assembling the magnets to the bobbin plates. We should have completed bobbins very soon and I will cut the covers after that.
|
Left: I am now assembling the pickup bobbins which will in turn allow me to custom fit the recesses in the pickup covers accurately. The bobbins will then go to thewinder to get finished. Right: Pickup bobbins complete and good to go to my winder. I now need to get the recesses cut into the two covers so these all fit together. |

Bobbins have been assembled and I can move on to a few more tasks.
|
|

Pickup covers now ready to be machined for the pickup bobbins. With that done they can go off to finishing..
|
Left: The two pickup covers have been machined down to finished thickness and sanded all the way round to blend with the finished size of the koa tops. Right: I'm busy cutting the bobbins for the pickups on this bass. This will allow me to test fit into pickup covers before they leave for the finishing process. So far so good. |

Cutting the pickup bobbins on the laser. Will assemble them with magnets next..
|
|

These covers will look great in the bass. Will cut them to thickness, clean up sides and machine out the insides very soon.
|
Left: Pickup cover bodies are assembled and I will be cleaning up the outer edges flush with the tops and machining insides. They will soon be ready for finishing. Right: Back working on the neck and body transition to get it all ready for final sanding. This is the most work intensive area for shaping on the whole instrument. |

My goal is to get the shaping all done so that I can get started on the sanding that will lead to this bass going off for its finishing process.
|
|

Belly cut underway and when that's done I will do a little arm relief on the front and work on the overall edge breaks around the front and back of the body.
|
Left: I got started on the belly cut on the bass. This feature really helps the fit on a bass if it is done in the right place. It's only roughed out at the moment. Right: In this photo I am gluing the continuous grain pickup tops to base material so that I have complete cover assemblies. I will clean them up flush and machine them next. |

Gluing the tops and bodies of the pickup covers together.
|
|

Pickup recesses cut - next will probably be WG logo nameplate!.
|
Left: This is the bass with the two pickup recesses machined out. One more step closer to finished. I will now finish up the nameplate at the end of the fingerboard. Right: The neck is getting a significant amount of material removed to rough it down much closer to finished dimensions. Getting started on final sjaping and sanding. |

Took a lot of extra material off the back of the neck so that I can start refining the thickness, shape and cross section of the neck profile.
|
|

The pickup recesses are currently only as deep as the top plate so I need to cut them deep enough to hold the pickup bobbins and cover assemblied comfortably.
|
Left: The instrument is back up on the CNC this time so that I can machine out the two pickup recesses to full depth. Not many machining jobs left on this bass!. Right: Running the program right now to cut the two pickup recesses to the correct depth based on the thickness of the covers that will be fitted in there. |

Cutting the remaining material out of the pickup recesses.
|
|

Making progress - I got the main control cavity cut now doing the battery cavity.
|
Left: I have now cut the control cavity to finished depth and I have also cut the recess into which the cavity lid will fit. I'm now in the process of doing the same thing for the battery cavity. Right: The battery cavity has now been machined including the recess for the lid and recess for the serial number which will be installed before finishing. |

Good step forward here - got the cavities completed and now I will cut lids for each of the recesses. I will also want to complete the body profile and get the belly cut established.
|
|

Grinding the area where the player's hand and thumb needs to reach to the top of the fingerboard.
|
Left: Working on roughing out the body to neck transition. The is all hand shaping using a small grinding tool. In the same process I will be slimming down the neck thickness closer to finished size. Right: The instrument has been set up on the CNC table so that I can run programs to cut the control cavoty and the battery cavity. |

I want to get these two back cavities (and their respective covers) done so that I can conecentrate on getting the instrument ready for the finishing process.
|
|

Machining the headstock back surface to achieve the correct thickness.
|
Left: This strange setup allows me to machine the back of the headstock parallel to the front in order to create the final headstock thickness. Right: Headstock now all slimmed down and ready for a little carving to establish the volute that protects the headstock. I will be doing this and some neck carving as my next operations. |

Back of headstock is now a finished thickness and I have started grinding the geometry that will create the neck volute which adds a lot of strength to he headstock area.
|
|

One more task out of the way - I will be machining cavities soon that will intersect with this feature.
|
Left: The body of the instrument is set up in the CNC where I am currently machining the recess geometry for the Neutrik output socket assembly. Right: The recess for the jsck socket has now been machined. Next task will probably be machining the control cavity and then creating a matching wood lid for the cavity recess. |

Neutrik recess is now complete.
|
|

Just one more detail job to get out of the way. I will be machiningcavities on the back of the instrument next.
|
Left: I am now doing a little machining to create a base for the nut at the end of the fingerboard. I will add a little piece of substrate material which the nut will sit upon. Right: Machining has been done on the nut area and now I need to cut and permanently insert a little nut baseplate piece upon which the nut will be installed. |
Just one more detail job to get out of the way. I will be machiningcavities on the back of the instrument next.
|
|

Headstock plate in place - just needs shaping now.
|
Left: Headstock plate attached and I have sanded around the perimeter a little to remove some of the material. Will finalize shape on this very soon. Right: I'm cleaning up the sides around the perimeter of the body so that I can consider the outer perimeter done. That will allow me to plot and cut the battery can control cavities. |

Working on finishing the sides of the body so that I can get the cavities machined.
|
|

Because this is a thicker than ususal headplate I will have to plan the creation of the truss rod access and cover a little differently.
|
Left: Next immediate goal here is to do the machining on the headstock plate that will allow me to cut the truss rod access cover from the parent material. Right: Gluing the Koa headplate onto the headstock of the instrument. It's still quite a bit oversize so once it's cured I will be sanding the perimeter to the final shape. |

Always hard to glue on angles pieces because the parts want to slide around on the glue. Lots of careful clamping will overcome that.
|
|

I'm using this piece of Ebony to creat a logo plate at the end of the fingerboard.
|
Left: I will be making a small nameplate at the end of the fingerboard for a discrete Watson logo - should look really nice on there when it is done. Right: More work on the Koa headplate. I will be cutting the truss rod access cover out of this blank very soon and that will allow me to attach the Koa plate permanently onto the headstock. |

The matching curly koa headplate will loook awesome on the bass - especially after finishing!!!.
|
|

Working my way around the body perimeter with the drum sander to get very close to final outside sizes and ready for sanding.
|
Left: Doing some drum sanding around the body to finalize the perimeter body shape. I will have to cut cavities in the back of the body pretty soon. Also have to add headstock veneer. Right: I have a nice piece of Koa for the headstock veneer which I need to get sanded and shaped and ready for installation. It will look great when done! |

It's an offcut from the body material so it is perfect. Will be cutting and fitting it and removing apiece for the truss rod cover.
|
|

Top plate being glued onto the body in the vacuum press.
|
Left: The instrument is now in the vacuum press where the top is being glued onto the body. Once everything is set I will remove the assembly and clean it all up. Right: This is the bass with the top attached right after gluing. I will need to get the two pickup cavities milled out to full depth as one of my next operations. |

Bass looking a lot more complete with the top on. Need to do a few machining operations next.
|
|

Once the top goes on these wiring channels are very valuable. It would be impossible to drill.
|
Left: I was able to get the instrument up on the cnc and I cut all the internal wiring channels needed to accommodate the wiring after the bass is completed. Right: The bass and the top plate are being prepared so that they can be glued together in the vacuum press. It will be nice to have these parts all together in one piece! |

Getting ready to glue the top plate on in the vacuum press.
|
|

Got pickup cover material cut and now I will be able to get the top onto the bass!
|
Left: Pickup covers have now been successfully harvested from the top plate material and I can now get the wiring channels cut and get the top plate attached to the instrument body. Right: I marked out all the areas on the top of the bass where the wiring channels need to start and end. Will be machining those soon! |

Having the pickups cut helps me plot the wiring channels. Just waiting for machine time now qand I will get them cut.
|
|

Getting ready to harvest out the continuous woodgrain pickup tops from the top plate.
|
Left: Now that I have mt program written I an setting up the cnc to cut the tops of the two pickups out of the Koa top wood. Placement is somewhat critical. Right: I have the top clamped to the CNC table and I'm cutting out the two pickup tops. Due to the tiny cutter size I'll have to flip everything over and finish from back side. |

Cutting out the pieces for the continuous grain pickup covers.
|
|

Carving the back of the neck and the transition with the body.
|
Left: With the fingerboard attached I have been able to do some aggressive carving on the back of the neck to get the profile down much closer to the finished cross-section. Right: Now setting up for machining out the two pickup covers from the top plate. I'm being extremely careful about positioning relative to the bridge locations. |

Just checking on computer that pickups are placed correctly so that I can harvest out the Koa tops from the top plate.
|
|

This bass is tarting to look a lot more complete. As soon as my machine is free I will cut the pickup covers from the top plate.
|
Left: I cleaned up the edges of the glue joint around the fingerboard so hat I could get the top plate to fit on again. Now I can mark out locations for harvesting pickup covers.. Right: I'm now doing some early roughing work on the back of the neck, mostly right now to get a feel for the proportions around the neck/body joint. |

FStarted on phase 1 of the neck shaping process. Just roughing it out right now .
|
|

Fingerboard attachment is always an elaborate setup. Great to get these pieces together and I'll probably harvest pickup covers next..
|
Left: After a few critical calculations I was able to get the fingerboard glued and clamped onto the rest of the instrument. Its position defines pickup and bridge locations on the body. Right: This is the instrument right after I removed all the clamping and rubber bands. Fingerboard is well placed and nice and solid. Now some cleanup. |

Fingerboard now part of the overall assembly. After some cleanup round the joint edges I will be able to fit the top plate - define positions for pickups and cut the continuous grain cover material.
|
|

Now that side dots are in the board can be attached to the neck.
|
Left: Fingerboard has now had all its side dots installed and sanded flush so the board itself is now ready to be glued onto the neck of the bass. Looks really nice!. Right: I did some machining at the headstock area to allow for the Koa headstock veneer and also to define the final linear position of the fingerboard relative to bridge locations. |

Top plate now ready to attach to the body. Coupl eof other operations to do first but it will happen soon!.
|
|

Planning for side dots and the precise linear position of the fingerboard.
|
Left: Before the fingerboard is attached to the neck I want to get the side dots established along the upper edge. Planning to use slightly off-white ones that match the color scheme of the woods. Right: The fingerboard is up on the CNC getting drilled for the side dots. Once this task is done and the dots are in I can attach the board to neck. |

Being careful to get the side dots placed accurately along the side of the board.
|
|

Top plate now ready to attach to the body. Coupl eof other operations to do first but it will happen soon!.
|
Left: The machining of the joint for the neck was successful and I now have a top plate I can fix onto the body. Next I have to cut wiring channels and trim the profiles. Right: Cleaning up the outer perimeter of the body to match the top plate. I will then be marking out locations for machining internal wiring channels. |

Cleaning up body perimeter.
|
|

Done with the body machining - now to get the top plate fitted.
|
Left: Machining of top of body and around heel of neck is complete. I now need to machine the same neck heel geometry into the top plate so that they fit together perfectly! Right: Top plate now being prepared for the CNC where I will be cutting out the shape of the end of the neck so that the top fill fit onto the body. |

Top plate about to be machined so that I can fit it onto the body.
|
|

Getting ready for nect operation which will be milling the top surface flat and also profiling the heel area of the neck.
|
Left: Marking out the area at the back of the neck where the fingerboard and body will be meeting. I will be machining the top surface of the body and the neck contour. Right: Body is up on CNC where I am leveling off the top surface and cleaning up all the way in to the neck heel so that top is ready for top plate. |

Generating a nice flat surface to the top to fit onto.
|
|

Upper body half being attached to rest of the bass.
|
Left: This is the bass with both the body halves attached. I can now attach it with various sanding devices to refine the body shape etc.. Right: I am marking out key points in the top plate so that I know where to cut the neck relief to allow it to fit onto the top of the instrument. I hope to be getting that done pretty soon! |

Can't wait to get the top onto the instrument - It's going to look really nice.
|
|

Machining joint faces on the two body halves.
|
Left: Working on the two body halves right now on the CNC where I am generating flat surfaces on each that will allow me to glue them onto the core section. Right: the top body half is now being glued onto the core section of the bass. I was careful in getting the pieces aligned properly. Next will be the lower body half attachment. |

Upper body half being attached to rest of the bass.
|
|

Back of core cleaned up to a finished surface.
|
Left: The back surface has now been machined and this will allow me to get the two body halves fitted so that we have something that looks like a bass guitar!. Right: Body halves have been trimmed closer to finished size and I'm now going to machine joint faces on each of them so that I can attach them to the instrument core. |

Looking more like a real bass - body halves going on soon!.
|
|

Getting ready to machine both sides of the core section.
|
Left: I now have the core section up on the CNC So that I can machine a joint surface on both sides for the body halves to be attached. They need to be suare and match the taper of the core. Right: I am now setting up on the CNC to thickness the body section of the core. This face will be machined parallel to the front angle. |

I had space on the CNC so decided to machine the body end of the core so that I have a finished face to work from.
|
|

Getting started on the fret work - it will look good when it is done.
|
Left: Getting started on the fret work. Cutting a few as I go and installing them - I will post a picture of the completed fretwork very soon. Right: All frets are in - filed to blend with edges and partially dressed already. I will now get the side dots in and once they are done the fingerboard will be ready to go onto the neck |

Fingerboard has been fretted and I have also dressed down the fret ends flush with the sides of the board.
|
|

Board is looking good already - I'll be doing some surface prep and then will install the frets.
|
Left: Inserts unclamped and I spent some time carefully sanding the inserted Koa blocks down flush with the curved ebony surface. Right: I cleaned up the FB surface and put a coat of sealer on it. Even at this early stage you can see the awesome figure of the Koa in each of the inlay pieces. Gonna look good against body and headstock! |

The Koa looks great in the fingerboard and will match the rest of the instrument really well.
|
|

The Koa pieces are still too thick but I will sand them flush after they have been glued in place.
|
Left: This photo shows the inserts I cut on teh laser places in the recesses on the fingerboard. I need to get some sanding done and then get the inserts glued in place. Right: I'm now systematically clamping the inlay material intop the recesses. When the glue is set I will sand and level everything to the fingerboard radius. |

I'm getting all the Koa fret marker pieces into the fingerboard.
|
|

Recesses have been machined into the top surface of the fingerboard.
|
Left: I was able to get the recesses cut for the fingerboard inlays. The board just needs a little surface sanding and then I will cut and install the Koa inserts. Right: Quick photo of my Curly Koa plates which I sanded down to approximate thickness and then cut out the shapes using the laser engraver. |

The laser does a great job on tasks like this!.
|
|

utting fret slots on the CNC and when that is done I will cut the recesses for the inlay blocks.
|
Left: I am busy right now cutting the slots for the frets. Once they are done I am going to cut the recesses for the inlay in the fingerboard. Right: I sawed up some offcut Koa so that I could have some nice consistent figured pieces to use for inlay in the fingerboard. I will need to sand them down and cust them on laser or CNC. |

Using curly Koa as block markers on the fingerboard.
|
|

Cleaning up the perimeter of the top plate.
|
Left: Using my single cut template to refine the contour of the top plate. I wil grind it to finshed size of the spindle sander. Right: I have set up thefingerboard on the CNC. I'm going to start by cutting the fret slots into teh board and when that's complete I hope to be able to also cut recesses for the inlay on the top. |

Setting up fingerboard for a few CNC operations.
|
|

Top plate is now one piece and looking good.
|
Left: This is the top plate after the two halves were joined together. I need to go back now to body components to get them ready for this top! Right: I have now done the programming for cutting the fret slots and the angled inlay recesses into the fingerboard. I will get the board set up on the CNC as soon as itr is free and get this cut. |

Programming for fingerboard is done.
|
|

I'm using the CNC to mill nice clean and straight joint faces on the two top plates.
|
Left: Just finished using the CNC to generate two nice clean joint faces for joining the two top plates together. I will now get then set up for gluing into one piece. Right: The two top halves are now being glued and clamped together to create a very nice top plate. Once it has cured I'll run it through drum sander to clean up. |

Gluing the two top halves together.
|
|

Some core machining coming up so that I can get the parts assembled together.
|
Left: I'm working on the core section to prepare it for the addition of the body halves and also the top plate. Will be machining joint faces and other features. Right: Top plates have been through the drum sanding process to get them prepared firstly for assembly together and subsequently for assembly onto the instrument. |

Cleaning up top surface of board before cutting fret slots.
|
|

Board has been cut to size and rediused, now needs a quick dressing to remove machining marks.
|
Left: The fingerboard has now been cut to finished size and also machined to establish the compound radius on the top surface. Next will be the machining of the fret slots. Right: I'm doing some manual work cleaning up machining marks on the top surface of the fingerboard. I will probably go ahead and machine in the fret slots next. |

Cleaning up top surface of board before cutting fret slots.
|
|

Cutting bodu halves so that we have a body for this bass.
|
Left: I had some really nice looking Alder in the shop which I decided to use for the back of the bass, It will end up being a very complimentary color with the koa and keep the instrument on the lighter side weight-wise. Right: These are the backs and top pieces shown together. They look good and we will soon have a complete instrument. |

Backs and tops ready for jointing and assembling.
|
|

Getting all the parts of this bass ready for further work. Top plates need to be sanded, cut and glued together and fingerboard is about to be cut..
|
Left: These are the components of our bass which I am working on right now. I'm just about to sand the top plates and get them shaped and glued together. Right: I sanded both sides of the Koa top plates and I'm now marking out the two pieces with the body template. I will rough cut the two top pieces and finsih sanding from there. |

Ready to cut out the two halves for the top plate.
|
|

I'm now ready to start machining the fingerboard.
|
Left: Fingerboard now attached to a solid substrate material so that I can move ahead and machine perimeter, compound radius and fret slots. Right: I did the programming for some of the upcoming machining for the fingerboard. Should work out to be a really nice one. I will get the setup done on CNC. |

Fingerboard is ready for some machining.
|
|

Cleaning up both sides of the ebony board so that I can get the machining started.
|
Left: I'm now sanding both sides of the ebony board flat so that it is ready for mounting on a substrate and getting the various machining operations done. Right: Fingerboard has been sanded flat on both sides and has also been trimmed closer to the actual neck width. I will now get the board ready for machining and fret slots. |

Fingerboard is ready for some machining.
|
|

Ebody fingerboard which is an expensive product these days. Had one left so I am using it on this bass..
|
Left: This is the ebony fingerboard I will be using to create the fingerboard on this bass. I will sand both sides so that it is cleaned up and can be fixtured. Should make a great fingerboard. Right: I used the bandsaw to remove material from the headstock and then did some rough shaping on the spindle sander to clean up the perimeter. |

Did some cleanup on headstock - it's still anout 1/4 oversize.
|
|

Carbon Fiber rods being glued into the neck of the bass.
|
Left: The two carbon fiber reinforcing rods are now being glued into the slots on the top of the neck. This will result in a very strong and rigid assembly. Right: The two carbon fiber rods have been glued in and the top surface of the neck has been filed and sanded flat. Next task will be the shaping of the headstock profile. |

We will have a multi-scale fingerboard going onto this bass and I need to make sure I have the rght transition between that and the headstock.
|
|

Koa is one of the nicest looking woods on the planet but impossible to get nowadays - especially anything figured. I had these pieces in the shop so I decided I might as well use them to create a beautiful top for this bass.
|
Left: I happened to have some Curly Koa left over in my shop and I'm planning to use it to create the top of this bass. Also the headstock face. Right: I cut two carbon fiber rods which will be installed inside the neck tpo add a great deal of rigidity and stability to an already strong laminated neck structure. |

Getting ready to install twop carbon fiber reinforcing rods in the neck.
|
|

Neck and body profile have been machined - good to get those features established.
|
Left: The perimeter of both the neck and the whole core section have now been machined to size based on nut and bridge string spacing. Next will be the two slots for carbon fiber rods. Right: This photo shows the two slots I just machined into the neck that I will use to install the two carbon fiber rods that will add strength and rigidity. |

The 2 slots for the carbon fiber rods are now machined. I can get this off the CNC and move onto other things.
|
|

The truss rod slot is now machined into the top surface of the neck. Next will probably be the neck/body angle..
|
Left: I machined the truss rod slot down the center of the neck plus I machined some extra geometry to allow space for the adjustment end of the rods. Right: I machined the top of the body area to create the required angle from neck to bridge. This will be a reference surface for machining I will do after neck perimeter is cut. |

Got the bodt top cleaned up although there is still material to come off this area based on the thickness of the top plate.
|
|

I machined a nice smooth and flat surface on the top of the neck area.
|
Left: The top surface of the neck has now been machined nice and flat. Looks really good already! Next operation will be cutting the headstock face to clean that area up. Right: Headstock surface has now been cleaned up and machined flat. I now need to do some calculations to machine the neck to body angle at the other end. |

Neck and headstock look much better now that the surfaces have been cleaned up.
|
|

Got the extra walnut added to the headstock area so I am now ready to get this core section up on the CNC for some machining.
|
Left: I added some extra Walnut material on both sides of the headstock area so that we can provide room for the headstock profile. Next will be machining. Right: The core section is now up on my CNC and ready to have some important features machined into it. I'll get the top joint face for the fingerboard done first. |

Ready to run several machining operations on this core section.
|
|

Three of the seven laminates are glued together - moving on...
|
Left: I now have three of the seven laminates assembled together and we are moving towards getting the other laminates assembled to make a complete core. Right: I got all seven laminates glued together so we now have a core to work with. Looks good with the contrasting wood. Will locate a nice top to match!! |

All tapered laminates together now - next step will be adding material for headstock.
|
|

This is the first gluing operation where I am attaching one of wenge laminates to one of the maple laminates. I'll repeat this operation with the other Wenge/Maple pair.
|
Left: Getting started on the initial gluing - I decided to pre-assemble the wenge and maple first as those two will require taper machining. Right: The central padouk core laminate has been run in the CNC to generate the tapered dimensions running from front to back. I'll also do the same thing to the maple laminates. |

The ceenter laminate has now meen machined to its tapered dimensions.
|
|

These laminates are cut from Walnut, Curly Maple and a center piece of Padouk. I'm also adding two accent pieces of Wenge! Should make a good core for this instrument.
|
Left: This will be a 5-string neck through bass. I'm starting with the materials shown here but adding a couple of Wenge laminates to make it look even cooler. Right: These are the various laminates that are going to make up what will now be a 7-piece core section for the bass. I have been sanding them to get them ready for assembly. |

All these 7 laminates have been sanded and some will need subsequesnt machining but they will soon be glued together and will look great!.
|
|


