|

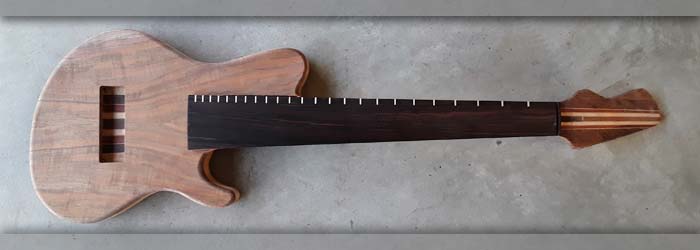
The backs of neck thru basses always look nice - especially this one with all these tapered laminates!.
|
Left: Back of the bass with the battery and control cavity covers in place. The battery cover has a little finger access feature to make it easier to flip the cover off when batteries need changed. Right: Quick photo showing the continuous grain through the pickup cover. This will be even more dramatic after a finish is applied. |

This is the top with the picjup cover in place.
|
|

I'm making sure here that I place the magnets in the lids as accurately as possible so that they line up with each other!.
|
Left: Final sanding being done and I am also carefully fitting the two back covers and adding magnets to the covers and body to hold them all securely in place. Right: This is the top of the bass after most of the sanding. Looks and feels very nice even at this stage. I also have a continuous grain cover for the pickupwhich is ready to go. |

HLots of final sanding going on but the bass is now nice and smooth all over.
|
|

I cut gold shell for the inlay and I will finish that off with special clear compound and then scrape everything flat.
|
Left: Turns out the gold metalflake was too dark when set on my test piece, and did not have enough contrast to show up well. I used gold shell. Right: The inlayed areas on the headstock have been cleaned up and look really nice. They will really pop out in contrast once the walnut material has been treated/finished! |

Haeadstock is actually darker than this photo indicates and will be even darker after finish is applied. The two logos will stand out very well.
|
|

Lots of clamping power on the headstock veneer - should work out fine.
|
Left: I am now gluing the headstock veneer onto the headstock so that I can complete that feature. I will also be filling the Logo and BMC2 with a metalflake compound which should look good! Right: Headplate on and getting cleaned up around the edges. I'll seal the inlay areas next and get some gold metalflake into those areas. |

Have some glue to remove but otherwise ready to do the logos on headstock and truss rod cover.
|
|

Getting ready to cut the headstock veneer and truss rod cover and engrave for the two inlay areas.
|
Left: This is my file for the laser. Red lines are cut lines and the engraved areas are in black. This will allow me to cut and engrave the headstock veneer in one operation. Right: Headplate and truss rod cover have been cut and also engraved. I need to decide on what to use to fill engraving. Since it's all pretty small might use metalflake. |

This is the headtock veneer right off the laser - all looks good and I need to sand it and get the main part attached to the headstock.
|
|

I will probably use a light colored shell on the darker walnut headstock veneer.
|
Left: We're planning on identifying this bass as the sister to the original bass so the headstock logo will have a BMC2 engraved in the same location on the headstock. Right: Have some matching walnut which I am going to use to create a headstock veneer and truss rod access cover on the headstock to match the body |

AThis is the thinned down piece of Walnut I will be cutting for the headstock veneer.
|
|

All of the surfaces are getting sanded -I am now very close to my customer's completion requirements.
|
Left: Cleaned up the headstock geometry and the volute at end of the neck. Reluctant to put tuner holes in the headstock since I'm not installing those. Right: A lot of sanding going on right now to get all the surfaces down to a smooth finish. One last operation will be the headstock veneer. Will probably cut that on the laser. |

Neck is down to the correct thickness - sanding all the other areas too.
|
|

Getting close on the shaping and now working on the surfaces.
|
Left: Filing and sanding on the back of the bass to get the edges and surfaces cleaned up. Neck is almost to finished size and what's left is mostly sanding (and sanding and sanding)! Right: I found this photo of the body before top went on that showed the areas that I machined out to create cavities for chambering (blue). |

I machined out as much of the body cavity area as I could based on the green areas.
|
|

Pickuo assembly fits fine in its custom cover.
|
Left: Test fitting the pickup assembly into the continuous grain pickup cover. Fits just fine. I will add adjustment screw holes to the corners of the cover and these parts will be ready! Right: Trimming the body profile a little bit to finish it off. Also working on the neck profile, body joint, belly cut and the back of the headstock. |

Working on the body perimeter and belly cut and transition on the front of the body.
|
|

Pickup bobbins have been wound and potted.
|
Left: Pickups have been wound - just received a photo of them from my electronics guy. Next challenge is to go pick them up so that I can test the fit in the pickup cover. Right: Just received pickup bobbins back from my winder. Still in package as I have not had time to check them out but will post more details on these soon! |

Just received the wound and potted pickup bobbins from my winder.
|
|

Not doe with the final carving yet but it's getting closer.
|
Left: Back to removing material on the back of the neck and shaping the headstock and body joint areas. I also started work on the belly cut and the radius that will run around front and back of body edges. Right: I heard from my electronics guy that the dual coil humbucker is about to be wound! One step closer to getting it all done! |

Pickup winding is under way.
|
|

Bass looks good with its fingerboard attached.Will be doing more carving and shaping now.
|
Left: Took off all the rubber bands and clamps and the fingerboard has been successfully attached to the neck of the instrument. This allows me to do some more final shaping on back of the neck. Right: I have been assembling the magnets into the pickup bobbins. As soon as the assemblies are ready they will go out for winding. |

Managed to get these bobbins completed. I'll have my electronics guy wind and pot them.
|
|

Always a lot of prep time when gluing a board onto a neck - once the glue is on there you have to act pretty fast and have everything at your fingertips.
|
Left: I have the fingerboard ready for installation and I am gathering the tooling so that I can permanently secure the fingerboard onto the neck of the bass. Right: Adhesive has been applied and the whole assembly is now under clamping pressure. I will leave this setup overnight for the adhesive to set completely and clean up in the morning. |

The fingerboard is now attached to the bass and I just have to wait until the adhesive fully cures.
|
|

Quick CNC setup to finish off the inlay.
|
Left: I set everything up on the CNC so that I can accurately finish off the inlay details. It's a slightly unusual setup but should work just fine. Right: Secondary side dot markers being glued into the bottom of the fingerboard. Once the adhesive has set I will file and sand everything flush and the fingerboard will be ready to attach. |

Secondary inlay has been glued in - just have to sand flush now.
|
|

Will do some quick machining on here then the fingerboard and trussrod can go on.
|
Left: I created a little fixture so that I could add some smaller side markers to highlight the standard fret positrions other than 12 and 24. Once that's done I'll attach the fingerboard! Right: On frets 3, 5, 7, 9, 15, 17, 19 and 21 I will add a little mirrired side square. 12 and 24 will have the double dots - that should make it easy for the player. |

Adding highlights to the operative fret markers.
|
|

WI'm machining out the inside of the pickup cover.
|
Left: Now machining the inside material out of the pickup cover. This will allow me to make sure the dual coils in the bobbins will fit nicely inside. Right: Pickup cover has been machined and I will be putting fingerboard on very soon. Might do a little additional work on side dots before I do that. Also belly cut and other shaping! |

WPickup cover fits nicely in the recess, making preogress.
|
|

I drew our the pickup geometry in a vector program and now just have to transfer that to the laser to cut the bobbins.
|
Left: Based on my customer'srequirements I am making a dual coil pickup system to fit into out pickup cover. I will have it custom wound and it should do a great job in the finished instrument. Right: Did a test set of flatwork for the pickup bobbins- all good so I will go ahead and cut all four componentsand keep the ball rolling here. |

Will be good to have these on hand as I cut the inside recess into the pickup cover!.
|
|

Pickup cover completed on the outside.
|
Left: The pickup cover is complete on the outside. Sanded down to match the top. I will be machining the inside of this assembly to suit the pickup bobbins. Right: I am now set up on CNC to machine out the inside of the pickup cover. I will also be cutting bobbin pieces on the laser so that I can assemble the pickups themselves. |

Just about to machine out the inside of the pickup cover.
|
|

Creating the continuous grain pickup cover..
|
Left: I'm now working on creating the wood cover assembly for the pickup. The top will be matching continuous grain with the top plate material. Right: I have my tooling out for the process of gluing the fingerboard onto the neck. Doing this will allow me to do the final carving for shape and thickness on the back of the neck. |

Fingerboar will be going on soon - close to being done!.
|
|

Back of the instrument getting closer to being done - need some carving at the neck end of the body and I'll be machining a recessed seat for the locking jack socket also.
|
Left: Both of the back cavities have now been machined and I can now go agead and machine out the pickup recess on the front side. The belly cut will probably be done very soon too. Right: Got the setup done for machining out the pickup recess. Currently about half way through the operation. Will be good to have this done! |

Milling out the pickup recess on the CNC.
|
|

Got the battery cavity cut out. Moving on to the control cavity next.
|
Left: Battery cavity has now been machined out. I will also create two holes for the retaining magnets and perhaps also the serial number in this area too. Right: Right in the middle of machining out the control cavity material. Once this is done I can get the pickup recess cut. These 2 cavities should also help reduce some remaining weight. |

Machining out the control cavity.
|
|

Instrument is almost one solid piece now. I need top sand around the outer edges first and then get the cavities machined.
|
Left: Top plate is now glued on to the body. I'll do some cleanup around the perimeter next and after that I will machine the pickup recess and the two back cavities. Right: The body is being set up right now on the CNC so that I can machine out the control cavity and the battery cavity. Then I will cut out the pickup recess. |

Setting up to machine out the two back cavities.
|
|

Pretty much done with the top plate and I will get it assembled to the body asap.
|
Left: Gluing done to the top plate of the bass. I'm now getting it cleaned up so that its ready to be glued onto the rest of the instrument. Right: I am now gluing the top plate onto the body of the bass in the vacuum press. I chambered as much of the insides as possible knowing that belly cut and cavities need theor own space too. |

Top plate being glued on to the rest of the body.
|
|

In order to get the top attached tpo body the piece for the top of the continuopus grain pickup cover needs to be harvested out.
|
Left: I have marked the location of the pickup on the top plate and I am now setting up one the CNC so that I can carefully harvest out the pickup cover material. Right: Pickup cover successfully cut out and I machined an insert to fill the back of the top. When this sets I'll clean up and I will be able to glue the top onto the body. |

Gluing a filler piece into the top to prepare for assembly.
|
|

I will be tapering the back of the body to create a belly-cut which makes the instrument much more comfortable to play.
|
Left: This is the proposed area I will relieve for the belly-cut on the back of the bass. I will do that as soon as I get the top glued on. Right: This is the working file for the dual coil pickup that we will be using in this bass. I had to establish sizes & position so that I could harvest out the parent material for the cover from the top plate. |

With the pickup center line placed 2.25in from bridge the poles should yield a good tonal balance.
|
|

I'm using borrowed bridge and pickup cover but just wanted to illustrate where the bridge and pickup would sit relative to everything else on the instrument.
|
Left: I'm using a Hipshot bridge for linear calculations and we will be putting our pickup just a little forward of standard bridge position with the goal being to get good clean tone with adequate lows. Right: Ready to do whatever chambering I can based on our latest pickup configuration. Top will be going on soon. |

We just revised the plan for the single pickup to be a humbucker so I am using that size and position to plan for chambering and wiring channels so that I can get the top attached.
|
|

Sanding down the excess glue and the CF material flush with the top surface of the neck.
|
Left: With the CF rods securely glued into the neck I am now sanding the top surface to bring the carbon fiber flush with the neck joint surface so that it is all ready for the attachment of the fingerboard. Right: Marking locations for pickups and wiring channels so that I can get the top on this bass. Also planning chambering wherever possible. |

I will chamber the body wherever that will not interfere with other features. Good to save any weight wherever I can.
|
|

I'm liking the look of the fingerboard on the bass - trying to get the work done to prepare for the top plate to go on the bass.
|
Left: I removed the fingerboard from its support material and it looks really good on the body of the bass. The next job I will do is cutting wiring channels in the top of the body. Right: I'm now gluing the two carbon fiber reinforcing rods into their respective slots in the neck of the bass. Will sand everything flat after glue sets. |

Carbon fiber rods being glued into the neck of the bass.
|
|

Doing truss ro slot right now and a couple of slots for CF rods.
|
Left: Bass is up on CNC so that I can machine truss rod slot and a couple of carbon fiber re-inforcement rod slots. I will then cut some wiring and possibly chambering slots and get the top plate attached. Right: I have now cut the truss rod slot and the CF rod slots on the CNC. I'll move on to installing the CF rods and cutting wiring slots. |

All the slots are cut into the neck. Next job is installing the carbon fiber rods..
|
|

I'll be doing some chambering, wiring channels, then top will go on and after that fingerboard will go on.
|
Left: Just a quick look at the fingerboard and how it relates to the body shape of the bass. I wanted those lines to be very visible to the player but fairly invisible to the audience. So far so good. Right: The revised headstock was marked out on the headstock material and then rough cut close to size. I will sand this down to teh finished shape. |

Headstock has been rough cut and I'll soon be sanding it to its finished shape and size.
|
|

This truss rod is bewteen the standard bass and guitar lengths - had to special order.
|
Left: The truss rod for this bass is a custom length due to the shorter scale of the instrument. I recently received it in the mail and can now go ahead and get the recess machined for it in the neck. Right: Inlay material has been glued into the upper edge of the fingerboard and partially sanded. Still have to sand them flush but looking good. |

Almost done with the fingerboard work.
|
|

Cutting and installing fret markers along the side of the fingerboard.
|
Left: Working on the fingerboard inlay. I have off-white material in the fret slots but may use pure white for frets 12 and 24. Right: I have inlay pieces cut for all 24 positions on the upper side of the fingerboard. This should look really nice when glued in and leveled off. I will also do treditional side dots along the upper edge of the fingerboard. |

Ready to glue the markers into the fingerboard.
|
|

This layout makes a lot of sense as it reduces the proximity of the B and E strings to each other. If it's OK with my customer I will probably go with something very close to this.
|
Left: I'm looking at the best possible way lay out the tuning pegs to keep the B and E strings more separate from each other but also keeping the B and E as long as possible. Right: I'm doing some modifications to the headstock so that I can reduce the overall size. Key element is the placement of the tuner pegs. |

We are looking at the possibility of reversing the tuners on the top of the headstock to better manage the string distribution and keep the headstock as compact as possible.
|
|

Cleaning up the fingerboard afer all that machining.
|
Left: Fingerboard is off the CNC and I'm sanding the upper surface to get rid of any machining marks. The slots can be filled with white of off-white filler material - will have to decide on that soon. Right: The substrate material has been removed from the backing board and I'm preparing the board to get some side dots established. |

Fingerboard ready for inlay and side dots.
|
|

So far so good - these should work great for the player but fairly discrete from the audience perspecyive .
|
Left: I'm making the "fret" slots on this fretless bass 1/16" (1.6mm) wide for visibility. That's about half the width of a metal fret but certainly wide enough to be clearly seen. Right: I went deep enough with the side slots to make them visible from the top and the side. Will probably add additional markers on side for key fret positions. |

Slots are deep enough to clearly show fret positions for the player but still leaving enough room for additional markers.
|
|

Top plate now fits instrument nicely - looks really good!.
|
Left: The material removal for the neck was successful and I now have a top plate that fits nicely on the body of the bass. Next step will be to clean up top plate flush with body. Right: I wrote a CNC program to cut partial slots in the fingerboard upper edge going under the B string. I'll test run and then cut those slots next. |

TMy program will create virtual fret lines from the upper edge of the fingerboard to a point between the B and E strings.
|
|

Getting ready to machine the recess for the neck on the top plate.
|
Left: I'm now setting up the top plate in the cnc so that I can cut out the shape of the end of the neck from the front end. This will allow the top plate to fit onto the instrument body. Right: This is the section for the instrument neck being cut out of the top plate. Had to be careful to cut it at exactly the right size. |

Top plate on the CNC getting cut to fit neck.
|
|

Cutting the fingerboard perimeter to its finished dimensions.
|
Left: Did the initial surfacing and now I am cutting the finished length and width profile arpund the fingerboard. When this is done I will move on to generating the compound radius on the top. Right: Last cut on the radius on the top of the fingerboard. I'm going to measure and probably sand the machining marks out next. |

Compound radius on the fingerboard now machined. I'll be cutting the partial fret markers very soon.
|
|

Fingerboard is prepped for machining on CNC.
|
Left: The fingerboard material has been rough cut and drum sanded for flatness and then attached to a substrate material for machining. As soon as the CNC is free I will be cutting the board geometry. Right: Fingerboard is now up on CNC getting machined. Will establish thickness, outer profile, top radius and partial fret marker slots. |

Getting started on several operations on the CNC to complete the fingerboard.
|
|

Bodt is now ready for the addition of the top plate. Will cut a few wiring channels first.
|
Left: The top surface of the body has now been surfaced and the end of the neck area has been machined square. I will probably go ahead now and machine the top plate so that it fits around the end of the neck. Right: The template gave me a perimeter to sand the body profile to. I'm in the middle of cleaning up that area to get the top attached. |

Cleaning up body perimeter to template size.
|
|

Ebony for the fingerboard now sliced down to about 3/8 inch. The final sizing will be sanding and then milling on the CNC.
|
Left: I split the large piece of ebony down to a more fingerboard-sized piece which I will now have to drum sand and mill to size. Right: Next machining move on this bass is to surface the top of the instrument and create the physical body end of the neck. That gives me a surface to glue the top plate onto. |

Machining the top face of the body to get it ready for the top plate.
|
|

Once top surface and heel of neck are machined I can fit the fingerboard. I'll need to machine wiring channels before the top plate goes on.
|
Left: In order to get this bass ready to leave my shop I think I need to machine the top surface to prep for top plate and cut and fit the end of the fingerboard area. Right: Working on the spindle sander to clean up a little bit around the body perimeter. I will check this body profile against the template I used for the sisted fretted bass. |

taking some of the extra material off the body contour.
|
|

Nice dense ebony I will be using for the fingerboard.
|
Left: This is the material I will be using to create the fretless fingerboard. Nice dense ebony which is perfect for the job. Just need to saw it up to fingerboard size!! Right: I rough sawed the fingerboard blank closer to its final width. Will now have to split it and then sand it down to a suitable thickness for further machining. |

I need to split this piece to just slightly over the finish thickness (which will be around 1/4 inch).
|
|

Top plate halves have been bookmatched together.
|
Getting back to work on this project and evaluating where we are. I need to get internal chambering done but first the extra core material on the top of the body will need cleaning up and leveling off. That will give me a flat surface from which to machine the areas that will be the internal chambers after the Koa top plate goes on. Fingerboard work will be happening soon too - we hve a possible plan for LED powered side dots. More soon! |
|

Evaluation the body shape to plan the next move on this bass.
|
I have a final plan and profile for the outlines of the chambering work I will be doing to the body of the bass. One important consideration is the belly cut on the back which is necessary for a comfortable fit but requires that the chambering compensates for that angle on the inside. In the past I have machined out the maximum material and finished the angled area on the inside by hand since it allows me to monitor thickness. |
|

Top plate halves have been bookmatched together.
|
This is the top plate after the assembly process. I managed to get a beautiful jont between the two bookmatched plates and the top looks great. I will be doing some cleanup and rough fitting to the body profile next. Following that I want to start looking at what's involved with the chambering of the body so that I can write a couple of programs that will accurately remove the internal material. Also need to fine tune the body shape. |
|

Gluing the two top plates together.
|
I'm clamping and gluing the two halves of the top plate together so that we have one bookmatched piece to work with. This will give me a chance to clean up and resove the outer perimeter of the body profile and do some work on the actual design and geometry of the "soundholes on the top plate too. I am writing a milling program to cut out a good amount of the material insed the bass but want to wait till the outer profile is completed. |
|

Top plate joints machined and ready for assembly.
|
Just a quick note on this bass to say that I have machined the two joint faces of the top plate in preparation for gluing the bookmatched to together. This will give me the opportunity to design and apply the hoe or holes through the top plate and also the material I will want to remove for the top of the continuous wood pickup cover. I will get this glued together soon so that I don't risk damaging the edges I just machined! |
|

Plotting out the areas in the bass to be chambered.
|
I had this bass out on my bench today to plot out the areas where I plan to do the chambering for the inside of the instrumant body. I have to take account of the location of the bridge - belly cut, pickup position and a few other factors. I'm planning to write up a program and get this material machined out so that we are one step further towards completion. I have also been working on top plate material and rough carving back of the bass. |
|

Machining the back of the headstock.
|
In this photo I am clamping the oversize headstock against the flat surface of my machine table and machining the thickness of the headstock down to a size that will allow me to continue work on this area. The headstock will have a veneer of material on the front to match the top material. In the meantime I have to now carve the back of the headstock to create the smooth transition between the flat surface and the back of the neck. |
|

Doing some carving on the back of the instrument.
|
This photo shows some of the rough carving on the back of the instrument. I haven't yet finished the outer perimeter although it's probably only about 1/8 oversize all round. I took this photo just after I rough ground some of the neck relief where the neck and body meet. This gets me a little closer to the finished shape of the instrument and certainly reduces some of the net weight. I will continue shaping and hope to start chambering soon! |
|

Just wanted to show the nice figured walnut top for this bass.
|
This is a very nice bass so far and it has all the ingredients to be a lightweight, comfortable tone monster. I want to keep it moving while my customer and I discuss some technical details and hopefully get it back into full gear again. In the meantime I am working on it as time permits so that it keeps moving closer to a finished instrument. I have a few more photos to post and I will add them very soon. |
|

Doing some carving on the back of the bass to bring it closer to finished dimensions.
|
Did some weight/mass reduction on this bass today. The blanks I used to assemble the core were oversize but now that we have a more complete assembly I can cut the features of the instrument a little closer to target sizes. I removed a lot of material from the back of the neck and the headstock which will facilitate further work I will have to do. Bass feels a lot lighter already! Next will be f-hole geometry. |
|

Outer perimeter of bass close to finished size, getting ready for more shaping work.
|
As you can see in this photo the excess core material has been removed and the perimeter of the bass body has been cleaned up. We are now pretty close to the finished outer perimeter. There are some tricky procedures coming up where we have to make neck relief, belly cut and internal chambering all work happily together. I think it will all go fine - just need careful planning on this one. Going to be very light! |
|

Both body halves have been attached.
|
I am in the middle of doing some spindle sanding to work on the preimeter of the body and bring it a little closer to the actual template dimensions. I will also go ahead and saw off the extra core material protruding from the back. The instrument feels good and I'm liking it so far. I will do some drawing to plan out the areas I will machine out to chamber the body. I'll also review where the f-holes are goint to be located. |
|

The upper bout for the back of the bass is being glued on.
|
And here we are gluing the second body half onto the core of the bass. Now we have something that looks like a bass guitar! I glue these body parts on with pressure on two planed. Obviously one is lateral, hlding the two joint faces together. The other is a downward pressure on a flat surface that does not become stuck to any of the glue that squeezes out. This guarantees me a flat suface on the back of the instrument. |
|

First of the two back bouts has been glued onto the core.
|
This is the core of the bass with the lower bout already glued in position. It checks out correctly for scale length and I am now able to get a few things cleaned up and sanded and attach the other body half. The woods look really nice together so I am looking forward to seeing the other body half attached. That will allow me to finish up the contouring of the body and consider what I have to do to create some effective chambering. |
|

Setting things up to glue the body halves onto core.
|
I spent some time today measuring out the placement of the features on this bass. I have to take the scale length and hence the location of the bridge into consideration when establishing the exact placement of the two body halves. I use the body template to help with this and then mark the reference points on the wood so that I can use that when I'm gluing the pieces together. I made the core section a little long just for safety! |
|

Cleaning up the back surface of the core section.
|
In this machining operation I flipped the core section onver to locate against the body surface that was machined with the neck-to-body angle incorporated. I can now use that surface to established what will be the finished surface on the back side of the core section. This bass is a little thicker in body width than most of my instruments by request of my customer. We will be chambering a lot of the inside of teh bass so weight will not be an issue. |
|

Body halves ready for assembly onto the center core of the bass.
|
The back plates have been veneered and also glued onto their Alder center core pieces so we now have two complete body halves. I also have run each one of these on the CNC to machine the joint faces ready for assembly onto the core section. Most recently I glued decorative veneer (maple) onto the two joint faces and they are now ready to be assembled together to make the body of the instrument! |
|

Back plates in the vacuum press having maple veneered glued on.
|
Since we have contrasting woods in our assembly I need to attach contrasting veneers onto the joint faces of the component parts. Here I am gluing maple veneer onto the walnut back plates. This will allow be to glue up the rear body parts and get them ready for assembly onto the instrument core. The body is going to be chambered so i have some unusual details to plan for. I will double check everything on my vector program before cutting. |
|

Just glued veneer onto the two body blanks.
|
This photo shows the alder center pieces of the body assembly after having a Lavoa veneer attached to the underside of each. This is to facilitate the assembly of the now complete back plates onto these body blanks. Once that task has been completed these sub-assemblies can be machined and attached to the core piece. This bass will now come together pertty quickly since a lot of the detail work has now been done! |
|

Gluing plugs into the recesses caused by harvesting the control and battery cavity covers.
|
After having machined out the two back covers I machined plugs from the same material which fit snugly into the back recesses I machined to release the lids. I the phot I am gluing these plugs back into the two back plates so that I have solid material to machine into when I mill out the actual cavities. Once these plugs are securely glued in I will level the plug material and they will be ready for veneer and subsequent assembly. |
|

Machining out the battery cavity cover.
|
If we want to have beautiful continuous grain covers on the back of the instrument this is really the only reliable way to achieve that. The profile of the cover is cut from the outer side and I then reverse the geometry, write another program and machine out the cover from the back side of the plate. I then have to make a plug to replace the material at the back. Once all that is done for both lids I can assemble the body! |
|

Battery cover is now profiled for harvesting.
|
Next operation was to profile cut the lid for the battery compartment so that it is also ready for harvesting. I'll flip this plate over and run a larger end mill round the same profile until the lid simply drops out. I will retain the lid material for later use. The battery compartment will house three 9v batteries since we will have an active EQ system and a set of LED powered fiber optic cables demanding current! |
|

Cutting out the profile of the control cavity cover.
|
Working on the back plates of the bass here. I need to cut the profile of the cavity cover using a very small cutting tool. I machine this cut just deep enough to exceed the expected thickness of the plate. Positioning here is critical because the material is still oversize but I have to place this cut in exactly the right location. All went well and I will be able to create a setup soon tp machine from the other side to release the cover. |
|

Gluing veneer onto the back of the top plates.
|
next step is to glue some of the decorative veneer onto the backs of the two top plate halves. Since the Walnit front and back will be assembled onto an Alder center core - I will use two contrasting veneers to highlight these joint areas. Should look REALLY nice! I will get the second veneer onto these soon and that will allow me to assemble the top plate. Once that is in one piece I will be able to define pickup locations. |
|

back plates are ready for harvesting cavity covers.
|
These are the two plates that will eventually be bookmatched together to make the top plate of this bass. Right now I am making sure the raw material fits the template and calculating what I need to machine off from the joint faces to make everything fit just right. I have a lot of different pieces to work on and assemble to create the body of this bass so it's important at this stage to make sure there are no dimensional oversights! |
|

Trimming up the body core ready for further assembly.
|
In order to start work on assembling the body halves to the core of the instrument I have to prepare the sides of the core so that they are perfectly square to the neck and top surfaces, and also follow the taper of the neck profile perfectly. I do this by setting the core up on an angle plate and using an indicator to guatantee that the surface I am going to cut is parallel with the neck profile. |
|

Back plates are rough cut and ready for machining.
|
The two walnut plates for the back have now been marked out and rough cut to suit the blanks for the upper and lower bouts. Since we are planning to have continuous grain wood covers I need to prepare these two plates for the machining that will harvest out the covers from the parent material and then allow me to glue the back plates onto the other material that will then become the two back halves of the body. |
|

SBack plates for the body halves!
|
The back plates have been resawn and sanded flat. They will become part of the back body halves when they are attached to the Alder we are using for the body core material. I will be doing some new things to this bass given that the body is a little thicker than our standard size and also it will be chambered which will result in a more or less hollow body. We will end up with a very lightweight instrument! |
|

Sawing the pieces for the back of the body!
|
By our customer's request the body of this bass will be a little thicker than standard. To that end I cust the core laminates a little thicker and I plan to use curly walnut both on the top and the back of the instrument. This will achieve the thicker body profile we are looking for. I'm also going to chamber the body so that will significantly reduce the weight of the instrument. In the photo I am resawing back plates from a solid piece. |
|

Curly walnut bookmatched top and back on this bass!!
|
I have two sets of bookmatched curly walnut for this bass, one set will go on the front and one on the back. The both have very nice figure, much of which cannot be seen here, but when a finish is applied there is some very nice cross-grain curl on both sets. This will make for an impressive looking instrument and very sppropriate for a fretless bass. I am getting ready to cut these tops and prep them for assembly. |
|

Machining the core of the instrument.
|
I'm cutting some more details into the neck so that we have a machined top surface, and a body angle and headstock angle which are accurately relevant to each other. The perimeter of the neck is also machined to size. This gives me a core blank with reliable datum faces which I can now use as references for further work. I'll now go aheand and prepare the upper and lower body bouts so we can get those attached. |
|

Setting the core section up on the CNC.
|
Next operation is to get this center core piece set up on the CNC so that I can machine some of the critical surfaces. I need to square up the blank to all three axes of the machine so that we start with reliable datum surfaces. I will start by machining the joint surface for the fingerboard and then cut the actual neck profile. I'll also cut the headstock and body angles and establish the channels for the carbon fiber rods and the truss rod. |
|

All 7 laminates assembled.
|
This is the center core of the bass. It's now ready for machining on the CNC. The blank is quite a bit larger than the finished producrt at this point, The next thing that I will do is set this piece up on the CNC and machine the profile of the neck, the joint face, headstock angle, body angle and several other significant features. Once those operations are complete we'll be able to attach the body parts. |
|

Gluing on one of the last two outer laminates.
|
Here we are getting the last two outside pieces of wenge attached to the core assembly. The wood combination should be great for a fretless instrument. The bass will look very impressive not only from the front but also from the back, thanks to the beautiful tapered laminates and the wood combinations. I am looking forward to seeing this bass come together. I can tell already that the neck has great resonance, |
|

Added the Padouk laminates to the assembly.
|
Moving along on the gluing of the core. I have now added the two tapered strips of Padouk. Ultimately this will be a core comprised of 7 laminate pieces instead of our usual 5 pieces. It's a little more work but in this particulat case it should serve to add a little bit more rigidity to the neck assembly which is something we want because we will be creating a very short scale neck for a 6-string bass. The more strength the better! |
|

Some of the tapered laminates have been glued together.
|
Now that all of the tapered neck laminates have been cleaned up and veneered we can start gluing them together to make the core of the bass. The process always starts from the center section and works outward and I only glue one tapered laminate at a time to be sure everything lines exactly the way i want it to. This bass has a great formula for sound, you can't go wrong with Wenge, Maple and Padouk! |
|

Two of the maple laminated having veneer applied to the sides.
|
I have been cutting all the component pieces of the neck on the CNC. While that is going on, the pieces that have been machined are moving to the vacuum press where I apply contrasting veneers to the laminates - dark veneer on light woods and light veneer on dark woods. End result will be a beautiful finish. I will be running all 7 neck laminaues through this process as the come off the CNC. |
|

Machining a taper on the center laminate of Wenge.
|
All of the various pieces that will go together to make up the neck have to be individually tapered. The neck on this bass is comprised of seven individual laminates and these all have to be carefully prepped and finished so that they go together perfectly. In the photo I am cutting the center piece of wenge to a prescribed taper. Once this is done I can apply decorative veneer to the sides and get the other pieces machined. |
|

All the different laminates have been rough sawn and sanded.
|
The core of the instrument is going to be mostly Wenge with stringers of Padauk and Curly Maple. At this point these have all been marked out and sawn from their respective boards. They have als been drum sanded so that I have a good flat reliable bearing surface from which I can machine the tapers on the internal laminates. These are all good woods for the core of any bass, the wenge will work well for fretless. |
|

First neck component has been rough sawn.
|
This may not look like much, but we have double checked our template and cut the first of the various laminates that will go together to make the neck and core of this bass. This is one of two outer pieces of Wenge which will be the main material of the neck. We'll also be using Paduk and probably some curlu Maple to add to the mix. I'll continue rough sawing out the components, then we'll have to do some drum sanding. |
|

We decided to use a nicely figured Walnut for the top of the instrument.
|
After exploring some options for the top material, my customer and I decided this curly Claro Walnut was the ideal choice for the look and feel of the bass we are building. The walnut has some beautiful color in the grain and it will be perfect for the fretless instrument we have planned. I'll also use this material on the headstock veneer so that we maintain a nice complete look to the final result. Now on to some sawing and sanding! |
|

I'll use Paduk for some of the neck components.
|
I recently purchased this plank of Paduk for a couple of current projects. We were looking for a 3rd wood for this bass to complete the set of laminates that will go together to create the neck/core. Paduk seemed to be a great option because it is great for tone, plus it compliments the colors of the other woods we are using in our assembly. I'll use this material for a couple of the tapered stringers in the multi-laminate neck. |
|

Some nce curly maple for the core section.
|
I have been shopping for woods I can use to create this bass. Here is one very nice piece of curly maple which i will use as a component to the neck and core section of this bass. The curly figure will definitely stand out on the back of the instrument! I will be combining this maple with Wenge which i will use as the main ingredient. There will also be another complimentary wood in the mix - I'm looking for something that will do the perfect job. |
|

We have some Alder which we are using for the back of the body.
|
We are planning to use some Alder for the two back pieces on the body of this bass. Our recipe for woods on this instrument is geared for nice smooth round tone since it will be a fretless. We'll have a multi-laminate neck which will give us a nice rigid core. The core section will consist of Wenge, Cherry and Maple. Some of the wood we have in stock - some will be bought from outside sources. Will update very soon. |