|

More carving to reduce some material around the chin area and get the legs a little mor accurately shaped.
|
Left: I am really wanting to get this carving in a condition where it can be seen and commented on by my customer so that we can do whatever final shaping is necessary. |

More carving to reduce some material around the chin area and get the legs a little mor accurately shaped.
|
|
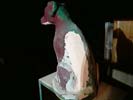
Got some more carving done on front and back legs and the back of the body.
|
Left: Working late today getting the ridgeback area just a little more defined. Also working on the back legs to get them looking better too. Right: I'm carving the chin area and some of the spaces between legs and body to get as close to the finished shape as I can with all this carving. Will post some shots of the results. |
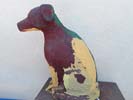
More carving to reduce some material around the chin area and get the legs a little mor accurately shaped.
|
|
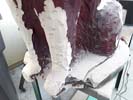
Front legs were too far forward but I have enough material here to move them back a bit.
|
Left: Back to the front legs where I need to grind off material more towards the body to make things look right. I have a photo handy to help with the proportions. Right: Working around the tail end here to give the back of the legs a little more definition and lastly to see if I can make the tail look right and natural. |
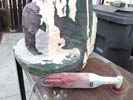
Working on carving the tail and backs of the hind legs. Typically I will grind away unitil the poor grinder is almost too hot to hold, then I'll give it a rest to cool down.
|
|
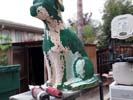
Carving away the unwanted material - front legs and lower body is quite difficult.
|
Left: More carving going on with the lower half of the body. Im going as far in as my carving tools will allow me and refinine the shape of the body and front legs. Right: Prepping everything for what I hope will now be a final pass on the carving. I think the final shape according to drawings I have is fairly close now. |
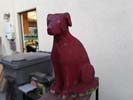
I repainted so that I could work on what I hope will be the last carving phase.
|
|
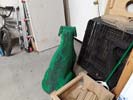
Looking forward to letting poor BB out as working in the garage makes a horrible mess.
|
Left: BB has been indoors for a few days due to bad weather and my need to work in a dry space. Ground some more marterial off the body and head and re-did the green. Right: Back into the carving process to further define the legs and feet. I want to keep the carving relatively strong and solid but at the same time show detail. |
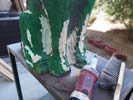
Being very careful in cutting out material that I can consider as free space between limbs etc.
|
|
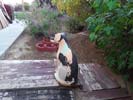
Working on the "whole dog" now and to that end I will be applying more paint so I can better visualise what else needs to be removed.
This is a photo of the material I removed in my BB session today - lots of chips rather than that dust that got in my clothes, hair and lungs from the other tools!
|
Left: Working on the body and the openings under the body and between the front legs. I am going to re-apply the black paint for the third time so I can work on more details. Right: I did some further carving around the legs and lower body to better define these features. Sprayed BB green to prep for the next carving session!!! |
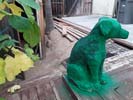
The paint really helps to see the "whole dog" while I am carving. I'm using what spare paints I have for that purpose.
|
|
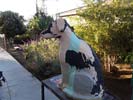
The new rotary tool got its first test today and I was really happy with it.
|
Left: Got a chance to try out the new tool today - it was GREAT-very easy to handle, cuts pretty quickly and an LOT less dust involved. Will post more on this soon. Right: One very interesting and helpful thing is that this cutter creates chips rather than the awful dust that the other tools created. Very happy - moving forward! |
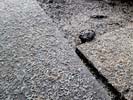
This is a photo of the material I removed in my BB session today - lots of chips rather than that dust that got in my clothes, hair and lungs from the other tools!
|
|
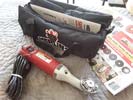
This is the best toolI know of to see BB through the last carving stages. Will be trying it out very soon!
|
Left: Just received the new tool kit which I am very excited about. They say it's an improved version of the ones I had before so I am eager to try this thing out. Right: Look at those teeth! Wow - will have to watch my fingers! I am hoping that this will work effectively and aggressively on the project to move it through its final stages. |
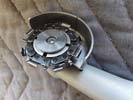
I have never used a tool bit like this but it looks like it will be very helpful!!!
|
|

This extension and abrasive tool should help a lot getting the details carved!
|
Left: Just back and getting everything ready for some agressive finishing work. Will be posting updated photos so please check back!. Right: I have tried so many tools but the best one was the rotary grinder that died on me. I decided to tough it up and spend the $270 for a similar (upgraded) tool that I KNOW does the job. |
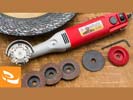
Although the other tools I bought and tried were good for certain things, this Merlin2 unit has been the only reliably effective carving tool for this project! I have one on order and should be here in a day or two.
|
|
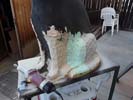
Most of the work right now needs to be onthe lower half of the body to define the legs and tail.
|
Left: Whole carving lighter now after removing a lot of material from the sides. My original rough carving was too fat. Right: Due to a significant family emergency I have to visit my mother in Scotland. Will be back ASAP to finish project and determined to deliver a close likeness to the beloved family member we are honoring. |

This extension and abrasive tool should help a lot getting the details carved!
|
|
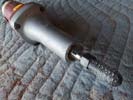
This tool is still handy but needs a very steady hand and glasses and a mask.
|
Left: That flexible extension I bought did not help as much as I hope as it won’t let me apply enough pressure. Ended up using an electric router with the same cutter. Right: Back to working around the head and neck. As I I remove material I re-spray the black. That helps me see the finished result better. |
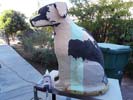
I have 4 different carving tools and a fan blowing dust away - progress starting tolook better in that I am feeling this is now looking more like a dog. Next details will be to make it look like BB but we are definitely getting closer!
|
|
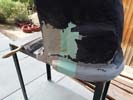
I must have filled a bucket with dust I ground off - mostly from sides and backs of the front legs.
|
Left: Defining the tail, the back and front legs and trying to carve away some of the space under the torso. Tools get really hot and I'm in 100 degree temps. Now need to take a shower to get the dust off! Right: After carving the left side of the body I am now working on the right side to match the body profile. Looking more real!!! |
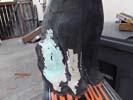
I used the dremel from hell to work on the right back and front legs. Asidefrom looking like asnowman I did manage to get some important shaping done in this area. I need to ALWAYS set uo an air system for this work.
|
|
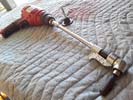
This extension and abrasive tool should help a lot gettiong the details carved!
|
Left: Since my small angle grinders broke down I have been searching for other tools to help me carve details and this contraption is my latest purchase. Should help! Right: Did some carving with the new cutter and flexible attachment, gets VERY hot. Takes a little getting used to but it works for the smaller details where other tools can't! |
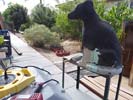
This extension and abrasive tool should help a lot getting the details carved!
|
|
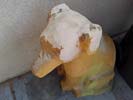
Have to get the head shape close to done before I set the locations for the eyes.
|
Left: While the carving is on the groundI have been working on the head. I want to get the ears done as close to original as possible. Going to put a collar on BB when we are done. Right: I have been finding it very helpful to spray black on the areas I am concentrating on as it helps see the areas that need material removing! |
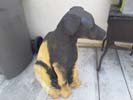
I am pushing to get BB done as I have some faamily commitments I may have to deal with in the coming weks and months. The black helps me see BB as acomplete shape and helps see where other details need to be cut and shaped.
|
|
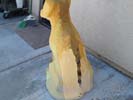
Just about that the point here where I will be applying color to the outside to help me selectively carve the final details.
|
Left: Attacked BB today with the rough grinder again to push things along and get closer to final sizes. I have photos on several clipboards to help me with seeing the whole thing from different angles! Right: Another good but very messy grinding day to get the lower half of the body looking much more realistic! |

Just about that the point here where I will be applying color to the outside to help me selectively carve the final details.
|
|
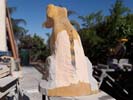
I was out early to beat the heat and worked mostly on the lower body.
|
Left: I had referred to several photos to try and get the body proportions as close as possible. Lower back area definitely coming along now and I'm also working on legs/tail etc. Right: Got some more work done shaping back legs and tail and I am starting to feel like we are getting a lot closer to final overall dimensions. |
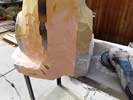
I was out early to beat the heat and worked mostly on the lower body.
|
|
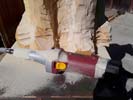
It's avery messy job but my grinding tools are doing well in helping me get material removed in the harder to reach areas. I must have created a bucketful of dust today - more coming.
|
Left: I'm going to be cutting out quite a bit of material between the legs at the lower body. Also removing a lot on lower right for the tail and back leg shaping. Right: It's only a temporary situation! I had to have the whole carving on its side today to get at the bottom profile. It's the only way to reach areas I need to establish for legs/feet etc. |
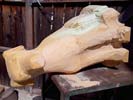
Super hot day today and hard top find shade to work in! I should have started earlier in the morning which I will do tomorrow. Working round the base where the tail and feet are.
|
|
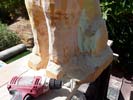
Working at the bottom of the body to start to define the legs and the tail.
|
Left: New grinding discs doing a pretty good job. Some areas are hard to get into but they really do remove material in a pretty accurate and controllable way! Right: There are anumber of vendors out there who make and sell eyes based on the characteristics of dogs.I'm looking for the right color and size so I can order a set. |

Some of these come as spherical items and some are curved and flat of the bottom. I am hoping to order some soon as I have them for the final work on BBs head.
|
|
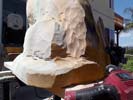
There is a lot of carving needed at the bottom end of our statue - I need to define the backs of the legs and the tail which will wrap around the left side of the body.
|
Left: Doing a little carving every day as I want Bebe to be sitting in his garden, not outside my workshop! I printed more pictures today for reference -we are getting closer to the finished product. Right: I ordered some new tooling to make my carving life easier. These are great 2in diameter abrasive products that will help me finish! |
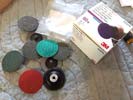
This 3M product is great - I didn't know it existed till recently. These will help me with this project and no doubt some of my guitar projects too!!!.
|
|
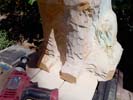
BB's legs are too far frorward so I am working those surface back a little. The more you cut - the more you see!.
|
Left: Despite the weather I worked on the ears and legs of this carving today to get some of the body parts closer to out subject. I'm just removing material till things look right! Right: I used the reciprocating tool to remove more material around the legs & body and where the tail is going to be. I am having my old grinders repaired right now. |
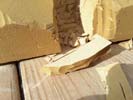
This saw is at least VERY good for roughing out big areas which is what I need right now. I should have my old grinder back any day and will use that for the finer surface details.
|
|

After being somewhat housebound for a while I am now more able to tackle some of my projects that have been patiently waiting for me. I am just about to tackle BB with my most aggressive grinding tool to reduce body with a bit and remove some unwanted material.
|
Left: I am currently using some manual tools to do the material removal and carving. I also have a reciprocating saw that creates less dust and I am hoping that is a safer way to move forward! Right: Interesting adventure today - I tried out a different carving tool that creates a lot less dust - was able to get some good carving results! |
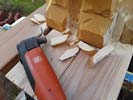
This carving tool is able to remove larger pieces of material with almost no dust! Awesome. Moving forward..
|
|
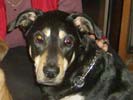
Ears are a big part of a dog's appearance and I want to get these carved as close as possible.
|
Left: These are the ears that I want to work on. They hang a little off BB's head and I have enough material to replicate that. Don't want to make them so fragile they could break but I think I can do this. Right: I am now using my large dremel to help do the detail carving. Have full sealed safety glasses and wearing a face mask too!!!
|
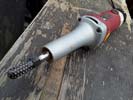
This tool is pretty aggressive but like the others it creates alot of dust. Very good for the smaller details so I will be using this a lot more as I do the final carving.
|
|
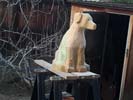
Getting a little closer every time I go out here and carve away - body is less thick now and I am working on the profle of the head.
|
Left: I am getting some of this done every day which is good. I have to find better eye protection - that dust gets in your eyes and it's horrible! Need to buy some sealed goggles. Right: Two things happened - my angle grinder stopped working and I'm trying to fix it - plus I had some eye issues with that dust that got in my eyes! |
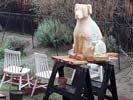
BB is out in the rain right now but I did get some more work donw on the back and lower body. I have a bunch of photos I printed which I am using for reference.
|
|
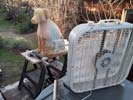
Text coming!.
|
Left: I went back to my smaller grinding tool to do some refinements to the head and body. Fortunately it was a windy day and I was able to work without getting covered in dust. Right: Back at work grinding the other side of the body. Removed the same 1 inch or so of material and I think the whole thing looks much better. |
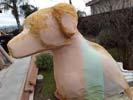
Experimenting with different tools so that I can get some of the detail work done around the head and on the front of the body.
|
|
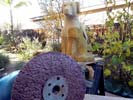
After being somewhat housebound for a while I am now more able to tackle some of my projects that have been patiently waiting for me. I am just about to tackle BB with my most aggressive grinding tool to reduce body with a bit and remove some unwanted material.
|
Left: Feeling a little better after several days of being ill. I was out today comparing photos to the actual BB model and making notes on what needs cut next. Right: Removed a lot of material to thin the whole carving down a little. The rough grit on the disc sander is really good for removing large amounts of unwanted material! |
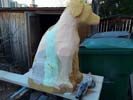
I took about an inch of material off the side of the carving to thin it down a little and refine some of the body features. Will do the other side the same way.
|
|
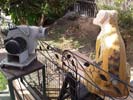
I have been narrowing down the head and neck and getting the ears closer to finished size. Took off a lot of material today!.
|
Left: Back grinding today and I must have taken 3 cubic inches off the head and neck area. I can see it coming together a bit better now. Right: My apologies for a slight gap in updates. I have been sick and have had to slow down and look after myself for a few days. Won't be long - I have plans I need to execute on this project!!! |

I hts that time of year and I caught something that is keeping me from getting my work done for a few days - ugh!.
|
|
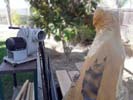
It's a super messy job but I think this will help keep the dust off ME while I am working on the carving details!!
|
Left: I was out grinding on BB yesterday and got covered in dust so I made a commitment to find a better way. I now have a high powered blower set up next to BB and I think that will help! Right: Success. I carved the other side of BB's head using the big blower and although I was dusty at the end it was MUCH better than before! |
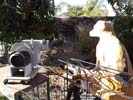
Goal today was to get the left side of the head to match the right side which I had carved closer to the photo images. Also working my way down - carved more of the neck area too.
|
|
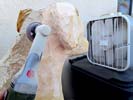
Taking a lot of material off round the ears and they are starting to look better. I'm glad I left extra material earlier on though. The fan is helping a little to keep all that dust off me when I carve!!!
|
Left: I got the ears looking a good bit better. The lower parts of the ears need to look like they are slightly separated from the head. If I go too far they will be too weak! Right: I am busy every minute of every day but the later part of the day is best for BB because carrving is messy work! Will have more pics later today! |
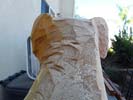
Back view of head where I am getting one of the ears closer to where I want it - then I will do the same to the other ear!
|
|
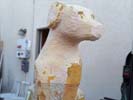
Woring on head shape - ears, and starting to define legs etc. I try to do this work later in the day because I end up covered in dust from head to toe!!!!
|
Left: Out working on the carving today with the objective of narrowing the head and getting the ears closer to what I have seen on various photographs. Right: More work going on around the head and nose of the carving to bring the shape closer to finished. I've also been narrowing down the body material for the lower half of the body. |
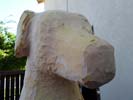
My goal today was narrowing down the head and then moving to the nose which also needs to be narrower and slightly tapered!
|
|
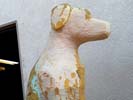
I carved away some head and body material today. I have to keep taking material off till I find BB in there and it's still a little oversize.
|
Left: More carving going on with the goal of achieving head to body scale and getting the shape of the head as accurate as possible. Still a little oversize but I am getting closer! Right: I'm pulling up as meany close up head shots of BB so that I can finish up most of the work on the head. Will post photos of the latest results here! |
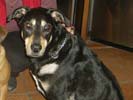
The head on my carving still needs to be narrower.
|
|
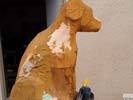
I'm getting ready to work on the more exact shape of the head using smaller carving tools.
|
Left: This is the current status of the carving. Most of the basic shaping has been done and I am now moving to less aggressive tools to work on some of the details. Right: My first detail challenge is the shape of the face and the scale of the head relative to the rest of the body. I'm carving away material around the head to make that happen. |
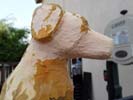
Working on the head size in relation to the body and the head shape based on my reference photos..
|
|
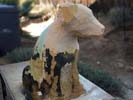
This was the overall carving after I had roughed out the body shape.
|
Left: This photo shows the carving with the head and body roughed out. I used the black paint to try to see the overall carving in terms of scale and proportions. Right: This is a good photo due to the angle of the light which gives me a lot of info on the shape of the head and the scale of the head to the body. |
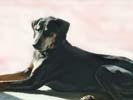
Another photo - good one of the head which helps me a lot!.
|
|
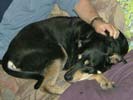
I'm not as concerned with the body as I am with the head and getting a really good likeness when I carve the final details.
|
Left: Another good photo of the dog's head which I will need to try and get a good likeness whan I do the detailed final carving of the head. The ears will be a challenge - we'll see! |
|
|
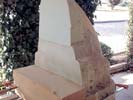
I may post a few of these older pictures so that we can see all the stages of the project. Nice to have them all in one place.
|
Left: I am posting several older pictures of this project so that we have a timeline to see. In this photo I am rough carving and adding new material to create the approximate size of the finished carving. Right: This is a pretty early photo when I was just assembling the blocks and rough shaping those to see how more blocks I might need! |
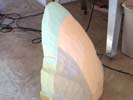
I used foam and gorilla glue because those wrere the two materials I knew would hold up in all kinds of weather!.
|
|

